
10 Things You Need to Know Before Starting Hand Embroidery
If you’re thinking hand embroidery could be your new hobby, here are 10 things I wish I knew before starting hand embroidery. I am so passionate about teaching people just like you how to become embroiderers because it is so much fun – in a relaxing kind of way. That’s why I created my kits and patterns, so that I can teach you from the comfort of your own home! Check them out here and sign up to my mailing list to save 10% and be the first to find out about new designs.
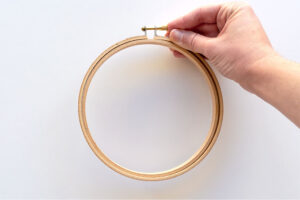
1. Embroidery hoops are not all made equal. It’s always best if you can buy your hoops in person to choose the best ones with no gaps or buy from a reputable online seller. Poor quality hoops often have gaps and you will struggle to keep your fabric tight. But if you end up with a gappy hoop, don’t fret. The quickest way to fix this is by simply using two layers of fabric instead of one – the extra thickness should close the gaps. Just make sure both pieces of fabric are pulled tight without any creases before starting. You could also wrap the inner hoop with bias tape or cotton ribbon but this can be time consuming.
2. Your fabric needs to be tight in the embroidery hoop ALL THE TIME! Continually tighten your fabric to ensure your fabric doesn’t pucker. To use your embroidery hoop, firstly loosen the screw and separate the two pieces, then put your fabric down and sandwich it between the two. Tighten the screw and then pull tightly on the fabric all the way around. Repeat this process while you stitch so your fabric stays nice and tight while you embroider. You can tell your fabric is tight enough if you gently tap on it and it sounds like a drum. This will also help remove any light wrinkles.
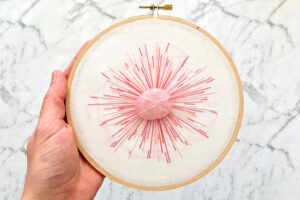
3. Thin fabric shows the back of your stitches. Sometimes you may want this look but I never do and it usually looks messy. This is especially true when you’re stitching with dark thread on thin, light coloured fabric, like white cotton. A simple fix is to use a layer of cheap fabric in a similar colour behind your fabric. So a double layer of fabric fixes multiple embroidery problems.
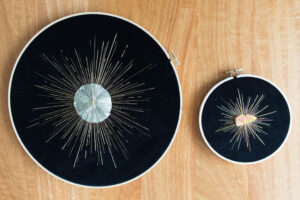
4. Stretchy fabric and hand embroidery are not friends. You will need to use a stabiliser if you want to stitch on stretchy fabric like polyester t-shirts. If your stretchy fabric is going to stay in your hoop permanently then you can also use a layer of thick non-stretch fabric behind your stretchy fabric. Just make sure that you don’t overstretch the stretchy fabric in the hoop before stitching because it will slowly pucker as you stitch. I embroidered these gold artworks on stretchy black velvet fabric so I used black cotton as my second layer.
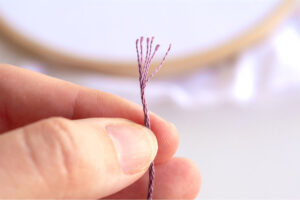
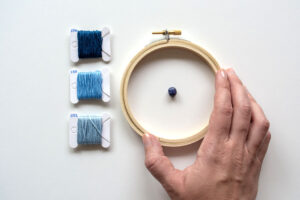
5. Stranded cotton has 6 strands of floss in 1. At first I was stitching with all 6 strands and hating that everything was so bulky *facepalm*. You can choose how many strands you want to use, depending on the thickness of the stitch you want. My favourite method to separate strands is to cut a piece to length (roughly 30-40cm), then hold it near one end and slowly pull out 1 strand at a time.
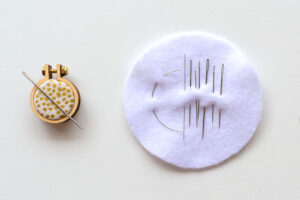
6. Use the right needle for the job. Match the needle size to the thickness of thread you choose to stitch with. A large needle for only one or two strands of floss will leave big holes in your fabric and a tiny needle will be too hard to thread lots of strands though the eye. I recommend getting a variety pack of needles with lots of different sizes so you can always use the right needle for the job. Different needles are also useful for different tasks. For example a ‘chenille’ needle will make French knots much easier because the eye of the needle is the same width as the needle itself, therefore you are less likely to snap a needle trying to yank it through your French knot. For beading, try using a ‘straw’ or ‘sharps’ needle as they are very thin but are not as bendy as a traditional beading needle. If you try to use a normal needle through a tiny bead you could break both the bead and your needle.
7. Embroidery needles are not all made equal. Cheap needles are more likely to bend or snap and the tip will get blunt quickly. But if you use the correct size needle for the job then they will last much longer. The method of storage will also help your needles last longer. Try storing them in a ‘needle book’ which is a piece of fabric folded in half or on a piece of felt with your needles neatly weaved through. If your needles are thrown in a metal tin they may become blunt.
8. Your stitches should be firm, but not too tight. Stitches which are pulled too tight will pucker your fabric and make extra-large holes in your fabric. When you’re stitching, don’t yank on your thread. Instead, pull gently in the same direction as your stitch until the thread is taught, then release the pressure before continuing with your next stitch. If you pull in the opposite direction you can disrupt the weave of your fabric. Pulling too hard also means you need to tighten the fabric within your hoop more frequently.
9. You need two hands for certain stitches such as French knots. Try using a hoop stand or rest your hoop between a table and your stomach. To do a French knot: with your dominant hand, bring your needle up from the back of the fabric and pull until taught, then hold your needle about 5cm above your fabric and wrap the needle with the base of the thread 1-3 times and hold the thread taught. I usually wrap twice but you can decide how chunky you want the knot. Then take the needle down right next to where it came up but make sure it’s not in the same fabric hole. Keep the tension on the thread with your non-dominant hand as you pull the needle through the back of the fabric with your dominant hand until it’s taught and you have a little knot.
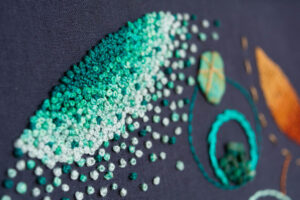
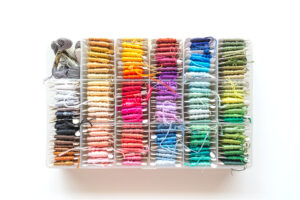
10. Find an organisation method before unpacking all of your thread. You will not be able identify your thread numbers once you’ve pulled the tag off. The thread number is located under the barcode. I personally use cardboard bobbins but some people use wooden pegs or other methods. Don’t forget to write the number on the bobbin/peg before taking the labels off the thread. Even if you plan on doing freehand embroidery that doesn’t require specific colours, it’s always handy to know the number of the thread. It allows you to match colour families which are various shades of the same colour to create perfect gradients – for example teal 3849, 3848, 3847 are all the same colour in different shades. Plus it also allows you to easily buy another skein of that colour if you run out. My burst kits come with the thread already wound on a bobbin so you don’t need to worry about a thing, you can just start stitching.
11. Bonus tip: DMC thread 666 (bright red) will stain light fabric if it gets wet. Wash it first and hang it out to dry before using it. Don’t be lazy like me on this one, trust me. So far all other DMC threads I’ve used have been colourfast, but some people have had troubles with black. But other brands of thread are not always colourfast so check the manufactures instructions and do a test piece if you’re worried.
I hope these tips have been useful. If you’re ready to start hand embroidery check out my kits which come with all the high quality essentials to get you started. The kits and patterns give you all the instructions you need to make your own amazing Crystal Embroidery Co artwork. If you have any questions, contact me or DM me on Instagram
Lots of love, Rachel